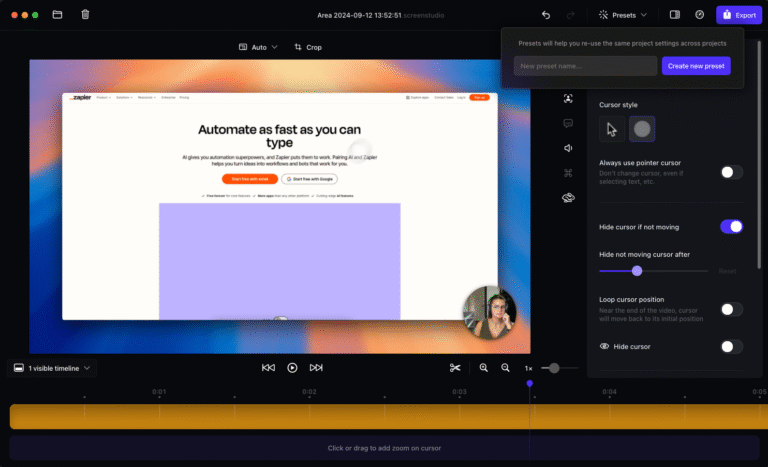
If you have ever wondered how to capture what is happening on your computer screen, whether for a tutorial, recording a meeting, showing gameplay, or creating a presentation, a good screen recorder is essential. In this guide, you will learn what a screen recorder is, what features matter, how to use it effectively, and which tools are worth considering.
Contents
What is a Screen Recorder and Why Do You Need One?
A screen recorder is software that captures video and usually audio of what is happening on your computer screen. It can record your entire desktop, a specific application window, or just a selected area. Audio may include your microphone, system sounds, or both. Many screen recorders also include a webcam overlay so you can show yourself while recording your screen.
People use screen recorders for various purposes, including creating tutorials or online courses, recording meetings or software demonstrations, streaming gameplay, showing how to use apps or websites, or capturing any process that is easier to show than explain.
Important Features to Look Screen Recorder
When choosing a screen recorder, you should look for several important features:
- The ability to select which part of the screen to record
- Capture audio from the microphone, system, or both.
- Webcam overlay for showing yourself while recording
- Multiple export formats, such as MP4, MOV, or MKV
- Basic editing tools such as trimming, cutting, or adding annotations
- No watermark or recording time limits for professional-quality videos
- Low system impact to avoid lag during recording
- Options to share or upload recordings easily
Free screen recorders often have limitations like watermarks, short recordings, fewer editing options, or lower output quality. Paid versions usually remove these restrictions and provide more features such as advanced editing, streaming support, and better performance.
Platform and Compatibility Considerations
Online Screen recorder may differ depending on your operating system. Some work across Windows, Mac, and Linux, while others are limited to one platform. System audio capture can require special settings on some operating systems.
There are also differences between desktop applications, browser-based recorders, and mobile apps. Desktop apps usually have the full feature set, while browser-based recorders are quick to start but may have fewer features. Mobile apps allow screen recording on smartphones or tablets, but may also have limited options. Choosing the right type depends on your workflow.
How to Use a Screen Recorder: Step-by-Step Workflow
A typical workflow for recording your screen includes these steps:
- Prepare your screen and audio by closing unneeded apps and checking the microphone and system audio settings.
- Select the area of the screen to record and choose your audio sources. Set the resolution and frame rate. Enable webcam overlay if needed.
- Start recording and perform the task you want to capture.
- Stop the recording when finished and save the file in a suitable format, such as MP4.
- Edit the recording to trim unnecessary parts, add annotations, or adjust settings, then share or upload the final video.
Tips for optimal recording include testing your audio beforehand, using a reasonable frame rate and resolution to avoid lag or large files, highlighting the cursor or zooming for tutorials, and avoiding unnecessary pop-ups or notifications.
Top Screen Recorder Tools Worth Considering
Some widely used tools include:
- Free options like OBS Studio, which is open-source and supports streaming, ScreenRe, which has no watermark, and Loom, which is web-based and easy to use for tutorials or remote communication.
- Paid or professional options like Movavi Screen Recorder, which includes scheduling and advanced settings, and Snagit, which offers screen capture and basic video editing features.
Choosing the right tool depends on your needs, whether you need a quick, free solution or a professional tool for high-quality production.
Best Practices and Troubleshooting Common Issues
Common issues include watermarks and time limits on free versions, large file sizes, audio not recording, lag or dropped frames, and sharing or compatibility problems. Solutions include upgrading to paid versions, reducing resolution or frame rate, checking audio settings, closing other applications, and testing settings before recording a full session.
Frequently Asked Questions
Can I record my screen for free without a watermark?
Yes. Some free tools allow full recording with no watermark or time limit. Check the limitations of the free version, such as audio tracks or export quality.
Which screen recorder is best for gaming or streaming?
OBS Studio is a popular choice for gamers and streamers because it supports game capture, live streaming, and webcam overlay. It may take time to learn the interface.
How do I record both the microphone and system audio?
Enable both audio sources in your recorder settings. Some systems may require additional settings to capture system audio.
Can I edit the recording after it is done?
Yes. Many screen recorders offer basic editing features such as trimming and annotations. Otherwise, you can use a separate video editor.
What format should I export my screen recordings in?
MP4 is usually the best choice for compatibility across devices and platforms. Other formats like MOV or MKV can be used for higher quality or editing purposes.
Conclusion
Choosing the right screen recorder depends on your purpose, platform, and budget. Free tools can be enough for casual use, while professional needs may require paid software. By understanding the workflow and features, you can capture clear and effective screen recordings for tutorials, presentations, gaming, or other projects.
